

Add an MCP server
You want the People team to ask their AI assistant about who starts next week without giving it the whole workspace. An MCP server is a named bundle of operations with a minimum role; you create it in two steps, details then operations, or start from a preset, and hand out its endpoint.
Before you start
Section titled “Before you start”- You are an admin or owner. Only those roles see AI in the navigation.
- Pick a name that will not change: lowercase letters, numbers and hyphens, starting with a letter, up to 63 characters.
- Know which operations you want to offer, or which preset comes closest. The picker lists only operations you can call yourself.
-
In Pyn, open AI in the left navigation, then MCP Servers under Agents.
-
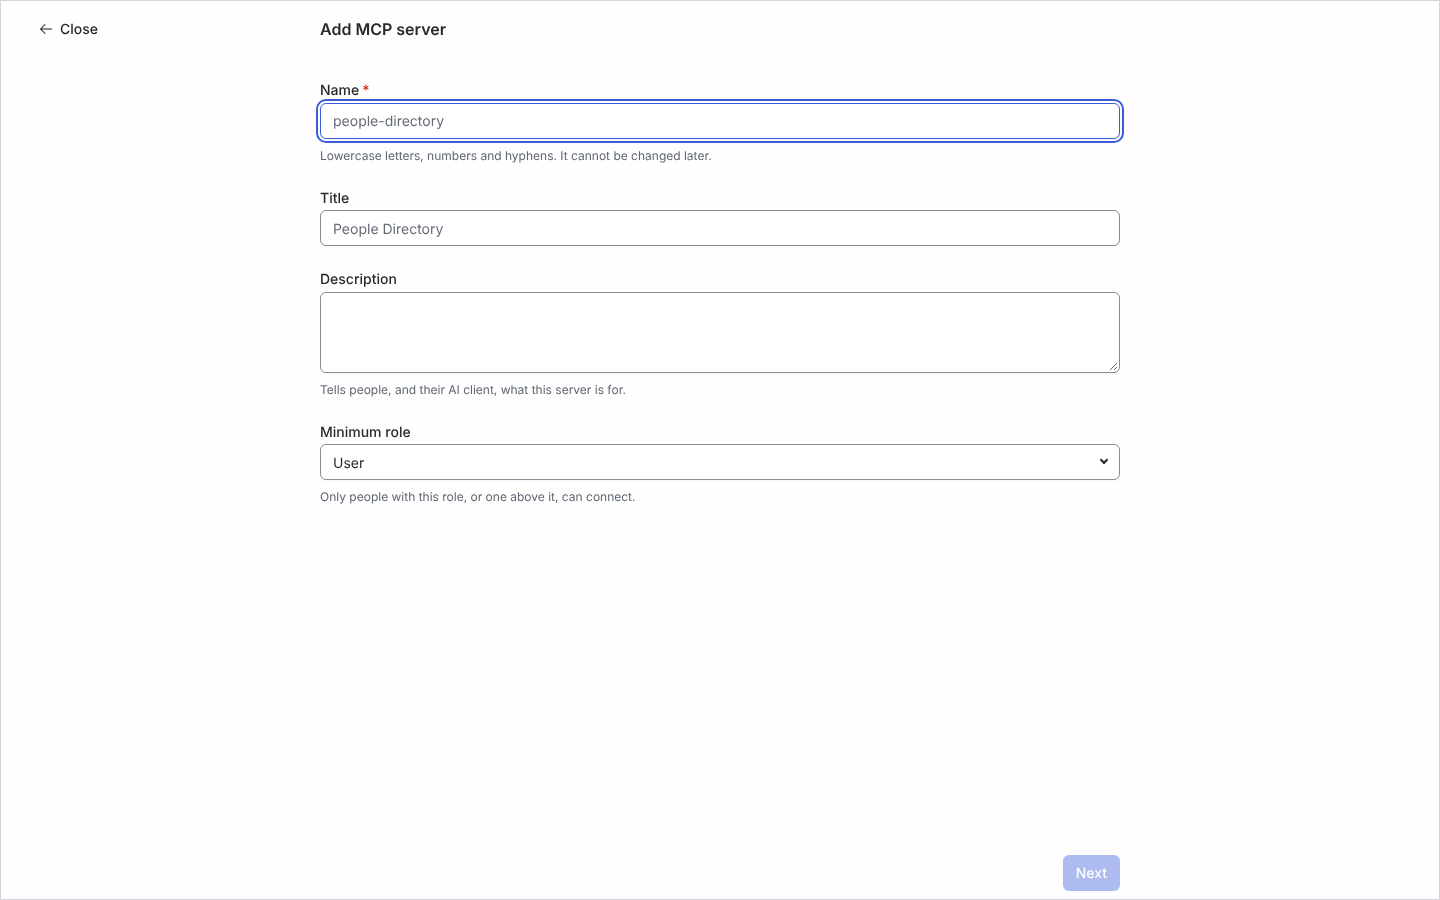
Select Add. The Add MCP server page opens. To begin from a ready-made bundle instead, open the arrow beside Add and select Add from Preset. The picker has two categories, Read only (People Directory, Workspace Explorer) and Read and write (Flow Author, Flow Operator, Forms and Polls, Journey Mapper, Onboarding Coordinator); each preset shows a description, how many operations it holds and the role it needs. Choosing one fills in the name, title, description, minimum role and operations, all of which you can still change, and nothing ties the server to the preset afterwards. A preset lists only the operations your workspace offers, and one left with nothing but
core_getTemplateis not shown. -
Enter the Name (for example
people-directory). The field explains “Lowercase letters, numbers and hyphens. It cannot be changed later.” -
Enter a Title and a Description: “Tells people, and their AI client, what this server is for.”
-
Choose the Minimum role: Owner, Admin, Power User or User. “Only people with this role, or one above it, can connect.” Select Next.
-
Under Operations,
core_getTemplateis already listed: it lets a client look up a template’s properties so it can make sense of the items it reads, and you can remove it like any other. Search to add each further operation. Each one carries a Read or Write chip, and the line under the search box counts “n / 100 selected” followed by the size of the tool list the chosen operations make, in kilobytes and an approximate token count (for example “108 KB · ≈31,000 tokens”): that list is what an AI client loads every time it connects. Past 256 KB a note reads “A tool list this large takes a noticeable slice of the AI client’s context on every connect. Consider offering fewer operations.” Remove one by selecting its row; the bin icon at its end marks what selecting the row does. -
Select Add. The server’s panel opens on the right.
What you should see
Section titled “What you should see”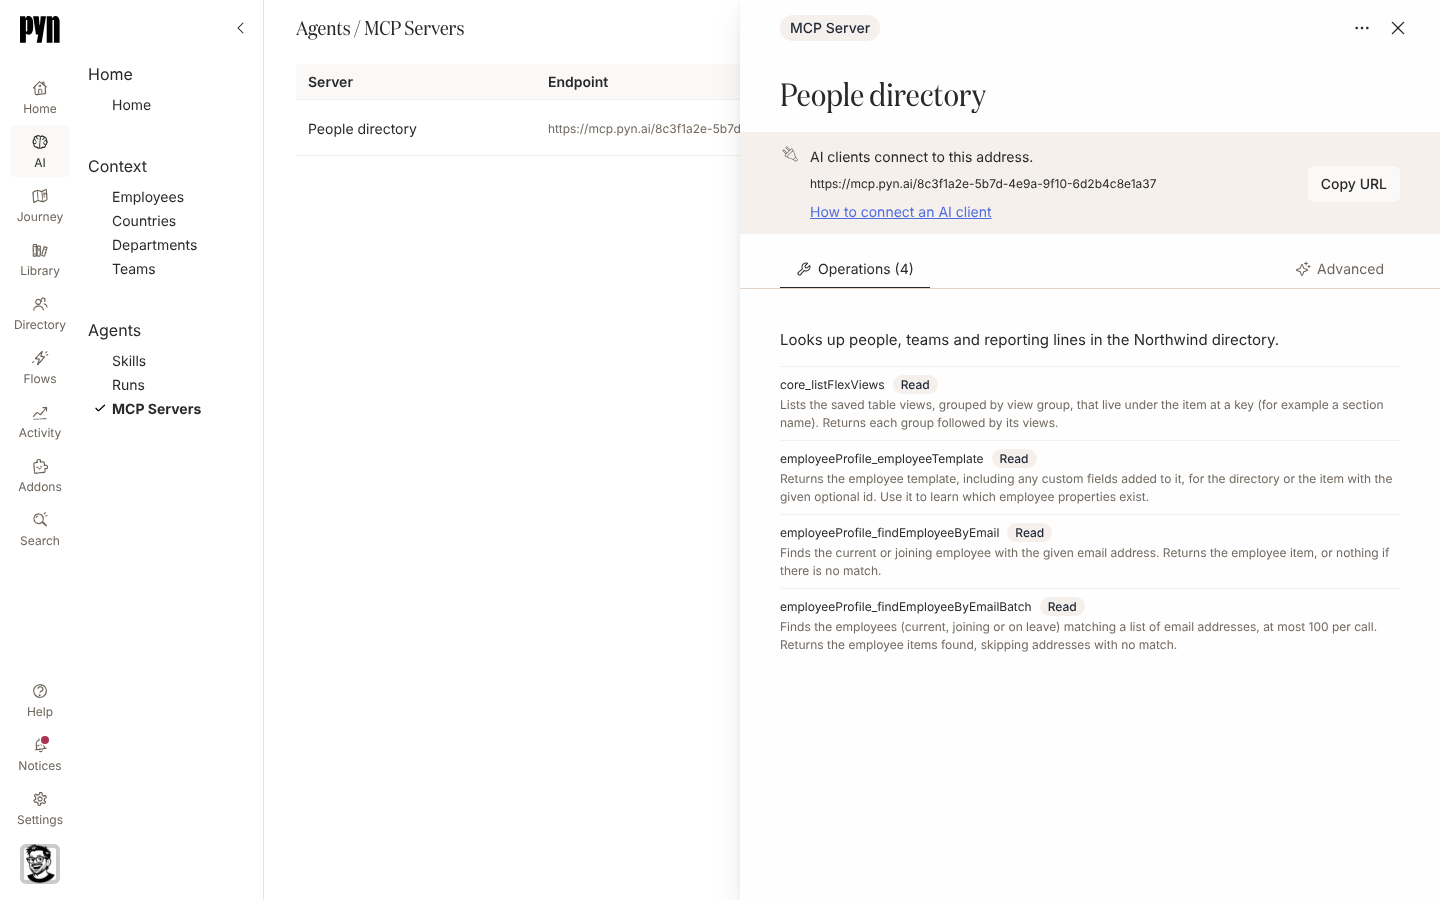
The panel opens with a callout, “AI clients connect to this address.”, above the address, a How to connect an AI client link that opens that guide in the Help sheet over the page, and a Copy URL button. The button reads Copied for a moment after you select it. Below the callout are two tabs. Operations, with the count in its label, holds the description, edited in place (an empty one reads (No Description)), and then the operations, each with its Read or Write chip. Advanced, at the far end of the tab strip, holds Minimum Role and Schema size, the kilobytes and approximate tokens the tool list weighs, with the same note under it once the list passes 256 KB.
Paste the address into the AI client’s MCP settings; Connect an AI client says where Claude, Claude Code and ChatGPT take it. The client sends the person to Pyn, where they sign in as usual (a magic link or SSO sign-in started from that screen returns to it) and then see Connect client?: “Client is asking to use server title in workspace as you. It can only do what that server offers and you are allowed to do.” Under that, a line counts the tools the client will get, split into read and write; Show opens it into Can read and Can change data lists naming each tool by its title (Get item) after the app it comes from, so the person sees exactly what the client will be able to do. Who am I comes with every connection and is not counted there. Someone whose role reaches none of them reads “Your role does not allow any of the tools this server offers.” Allow sends them back to the client, connected; Deny refuses it. Someone below the server’s Minimum role sees Connection Failed with “Your account is not allowed to connect to this server.”, and a request left open too long reads “This request has expired. Start again from your AI client.” Once connected, the client’s tool list shows Who am I (who_am_i), which answers with the person, the workspace and the server the connection acts as, so you can confirm who the client is working as, and one tool for each operation on the server that the person’s own role allows, named after the operation (for example core_getItem) and titled in words where the client shows titles (Get item). Each tool runs as that person, and an operation their role does not reach is neither listed nor callable. Write tools change data and are marked that way, so a client that confirms such changes asks the person first. Operations that manage MCP servers are never offered, and a call that names an MCP server or connection is refused. Clients that run in a browser connect the same way as desktop ones. The server row shows Active; use Disable in its … menu to pause it, which also drops every existing connection.
Related
Section titled “Related”- MCP Servers for how access is decided.
- Connect an AI client to add the address to Claude, Claude Code or ChatGPT.
- Users for what each role can do.
- AI for Pyn’s built-in agents.